Recent posts with visuals

Showing posts with label recipe. Show all posts

May 8, 2015

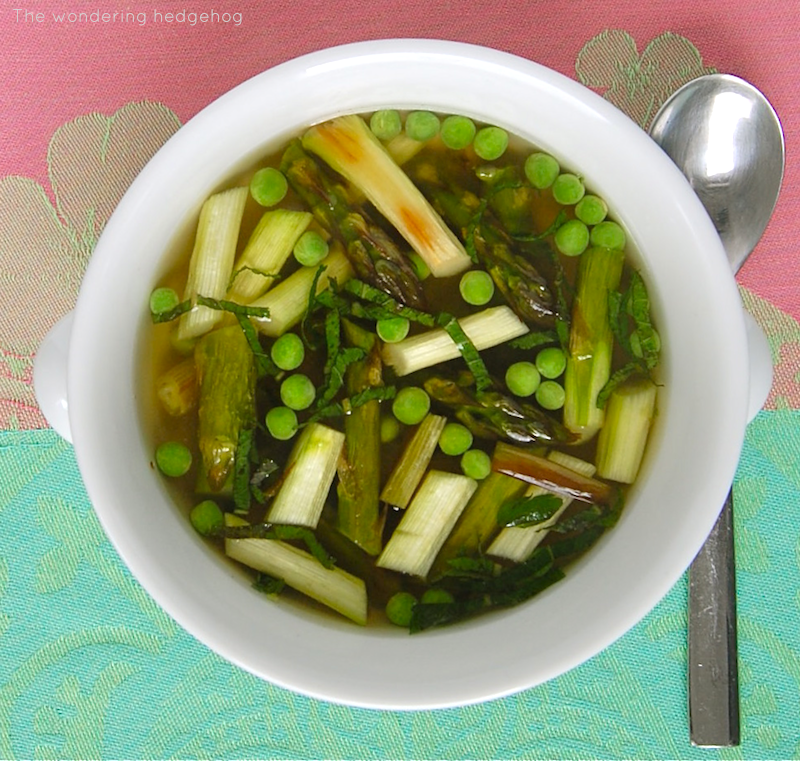
Bouillon with spring vegetables, mint

            The very smell of mint reanimates the spirits, and its flavour gives a remarkable zest to food.
~ Pliny the Elder, Natural History

Spring brings with it a kaleidoscope of flowers, young leaves in every shade of green and the first produce of the year – asparagus, peas and tender fresh herbs. It also often brings cold thunderstorms (occasionally featuring hail), and chilly, foggy evenings - in other words, perfect soup weather. Not a winter soup, laden with meat, robust legumes and earthy root vegetables. Rather, a spring soup, soothing yet light – a cashmere throw instead of a hefty eiderdown comforter.

This recipe was inspired by a recent meal at Le Comptoir, one of my favorite restaurants in Paris. The addition of mint brings an unexpected burst of flavor to the broth, a riff on a classic combination of mint and lamb. In fact, the soup features two quintessential mint pairings – mint & meat and mint & peas.

Bouillon with spring vegetables and mint
The recipe is very easy, although it does consist of several steps. Most of the components may (or, indeed, must) be prepared in advance; final assembly takes less than 10 minutes.
Serves 2
  • 2½ Cups home-made chicken stock (roasted or otherwise)
  • 6-7 stalks of asparagus
  • 3-4 scallions
  • ½-1 Cup green peas (frozen or fresh)
  • 5 fresh mint leaves
  • ½ Tablespoon (or less) neutral oil – rice bran, canola, grape-seed, light olive
  • Kosher salt
Clarify the stock
While not essential, this step makes for a more attractive presentation and an ethereal-tasting bouillon.
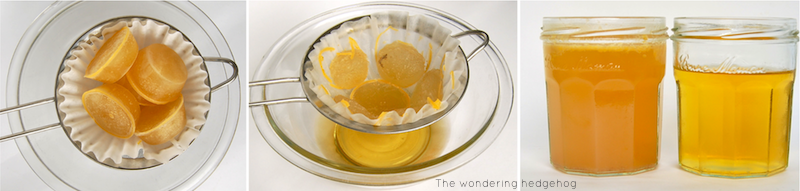
Freeze the stock in an ice-cube tray, muffin tin or a Ziplock bag placed flat in the freezer. Once frozen, place the stock cubes (if using a Ziploc bag, break into smaller pieces first) in a strainer lined with a coffee filter or a paper towel. Put on the counter (or in the refrigerator) to slowly thaw. The gentle melting process will result in a crystal clear stock, leaving behind the sediment which gives stock a cloudy appearance.
This bouillon would also work beautifully for floating some lovely ravioli.
N.B. Do not re-freeze previously frozen stock.

Prepare the peas
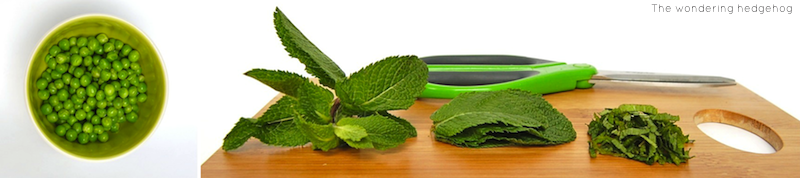
If using frozen peas, take out of the freezer, run under cool water and set in colander to thaw. If using fresh peas, shell the peas.

Roast the vegetables
Preheat the oven to 425°F/220°C (400°F/205°C for convection oven).
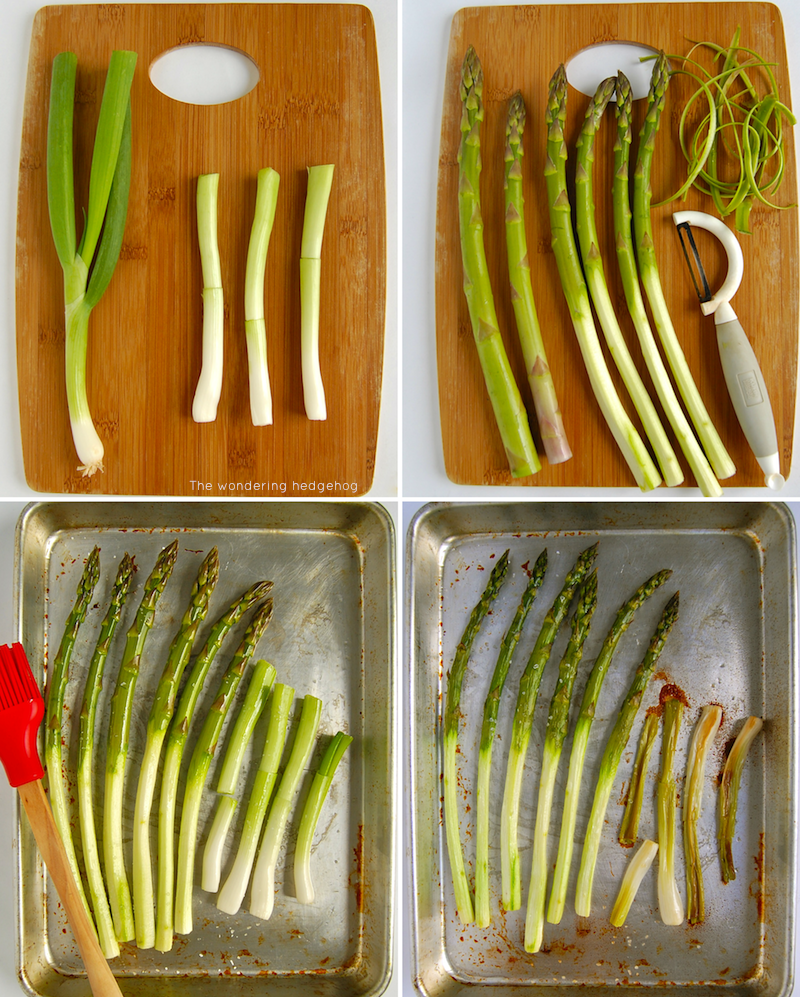
Wash the asparagus and scallions. Trim the roots and bright green tops from the scallions and peel off the first leaf (it is usually wilted and papery). Hold an asparagus spear near the ends and gently bend – the point at which the spear will be ready to snap is where the tender part of the stalk becomes tough. Peel the woodier root end without snapping off, or remove and save for making stock.

Place the scallions and asparagus on a baking sheet, gently coat in oil (a pastry brush simplifies the job), and sprinkle liberally with salt. Roast for 12-15 minutes, until the scallions are completely soft and caramelized.

Remove from the oven, cool slightly1 and cut into bite-sized pieces.

This roasted asparagus and scallions preparation can also be used in other dishes. It makes an excellent pizza topping, a tasty filling for a quiche (add the peas as well) or a simple vegetable side (leave whole).

Final assembly
Wash and dry the mint leaves, stack them neatly, fold in half laterally and cut into thin strips. Kitchen scissors work marvelously here, reducing the effort of the traditional chiffonade technique – rolling the stacked leaves into a tiny, minty cigar, and cutting with a knife. (A tiny cigar is not an easy thing to hold while wielding a sharp knife!)

Gently heat the bouillon in a small pot; add the peas and cook until tender, 2-3 minutes. Be sure to keep the bouillon at a very gentle simmer – do not let it boil.

Add the sliced asparagus and scallions, and allow to heat through, another minute or so. Taste and adjust the seasoning if necessary. Divide the soup between 2 bowls, sprinkle with the mint and serve.

I find this is the best way to store asparagus if I am not using it immediately after purchase – trim off ¼ inch (1cm) off the root end, stand in a tall container with an inch or so of cold water, cover with a plastic bag (secure with a rubber band) and refrigerate.

1 Or cool completely, wrap in foil or place in a covered container, and refrigerate for up to 24 hours in advance. Slice right before final assembly.

April 20, 2015

Raisin rice pudding

Davros: ”We shall become all p...”
The Doctor (interrupting): ”Powerful! Crush the lesser races! Conquer the galaxy! Unimaginable power! Unlimited rice pudding!”
Doctor Who: Remembrance of the Daleks (Part IV)

A recent houseguest, upon hearing we were having rice pudding for dessert, informed me that his father, and his father's father before him, were proprietors of an extremely successful Greek diner in New York City; as such he believed himself to be somewhat of a expert on the dish. Upon tasting this pudding, he sat for several minutes in meditative silence, looked me in the eye and said, ”I don't understand - this has so much flavor! How is it possible for rice pudding to have so much flavor?”

Rice pudding, while firmly established as an indulgent treat in the desserts category, is surprisingly healthy. A generous serving has less than one glass of whole milk and a just a few teaspoons of rice and sugar. The pudding's luscious, creamy texture results not from butter or cream but rather from amylopectin, one of the two components of starch (the other is amylose). As the rice cooks, it absorbs the milk, each grain increasing in size several times. At the same time, the grains release starch that acts as a thickening agent. To achieve the correct texture, it is important to select the right rice.

This recipe calls for short-grain rice, which has a very high amylopectin content. Short-grain is a classification, not a specific variety; Arborio (or any generic risotto) rice or sushi rice would work well. There is no need to look for a specific brand - the required rice grain, under any name, should be a stubby oval instead of a long, thin grain. Medium-grain rice (indeed, some classify risotto rices as medium rather than short-grain) could be used as well - its lower amylopectin content will simply produce a softer and more relaxed pudding.

Look for rice with grains similar to those on the left (on the right is Basmati rice, a long-grain variety, for comparison). Rather than paying a premium for fancy risotto rice, look for the right rice in a Middle Eastern grocery - rice pudding is a popular dish throughout the region, and the prices tend to be more than reasonable.

Raisin rice pudding
Inspired by the baked rice pudding from Marion Cunningham's The Breakfast Book.


              2-3 Servings               4-6 Servings
  • 2½ Cups whole milk
  • 2 Tablespoons short-grain rice
  • 3 Tablespoons sugar
  • ¼ teaspoon salt
  • ½ vanilla bean
  • 3 cardamom pods
  • 1 cinnamon stick
  • ¼ teaspoon grated nutmeg
  • 3 Tablespoons raisins
  • 5 Cups whole milk
  • 4 Tablespoons (¼ Cup) short-grain rice
  • 6 Tablespoons sugar
  • ½ teaspoon salt
  • 1 vanilla bean
  • 5-6 cardamom pods
  • 1-2 cinnamon sticks
  • ½ teaspoon grated nutmeg
  • 6 Tablespoons raisins
Preheat the oven to 150°C / 300°F.
N.B. If using a convection oven, reduce the temperature to 135°C/275°F.

Cut the vanilla bean 1 in half lengthwise and scrape out the seeds with the back of the knife blade.

Place vanilla seeds and empty pod into an oven-safe, heavy-bottomed dish, add all the remaining ingredients except raisins and stir well.

N. B. This recipe works equally well with coconut milk, diluted with water in a 1:1 ratio.

Cover and bake, stirring after the initial 20, 40 and 60 minutes. After a total of 2½ to 3 hours for the smaller batch (3½ - 4 hours for the larger one), remove from the oven, stir in the raisins, cover again and let rest for at least 15 minutes. The moisture and heat from the pudding will plump and soften the raisins.
N.B. The total cooking time needed will vary depending on the baking vessel. A wide, shallow dish promotes evaporation, and the pudding will reach the right consistency faster than if cooked in a narrow, tall pot.

The result is dense and rich, heady with bold, exotic flavors of cardamom and cinnamon. For a gentler, more mellow flavor, omit all spices except the nutmeg. For a softer texture, thin the pudding with some warm milk before serving or use a medium-grain rice such as Calrose. Adjust the sugar level to your liking, increase the amount of raisins or leave them out entirely.

The pudding should keep in the refrigerator for up to five days; it never seems to last more than two.


1 A quick note on vanilla beans. Purchasing vanilla beans at the last minute in the local supermarket tends to be expensive and often offers only a solitary, dessicated bean. As a sporadic baker, I do not use a lot of vanilla beans, although I do buy them in bulk when a good price/quality ratio is on offer. Theoretically, high-quality vanilla will keep almost indefinitely in a cool, dark place; however, even when properly stored the beans do tend to dry out over time. Macerating the beans in alcohol keeps them plump and has the added benefit of producing an excellent vanilla extract, something even a casual baker will find useful.

Start with a clean, resealable, watertight container; add vanilla beans, and enough good quality vodka (nothing that comes in a one-gallon plastic jug, please) to completely submerge the beans. Minimum recommended ratio is 5-6 vanilla beans for every 1 Cup/250ml of alcohol (at least 70 proof). Seal the container and leave in a cool, dark place. Shake occasionally; after 4-6 weeks the extract will be ready for use. As the liquid level drops, top off with more vodka and add vanilla beans as they are purchased. When a recipe calls for a vanilla bean rather than extract, pull one out of the jar and cut off the end - the seeds will pour out, no scraping necessary.

April 18, 2015

Yogurt, Greek style

     Don't cry over spilled milk. By this time tomorrow, it'll be free yogurt.

~ Stephen Colbert


As the weather warms up, a conscientious cook's thoughts turn to dishes that require little to no cooking, and can cool and refresh on a muggy day. The humble plain yogurt provides a perfect building block for a range of recipes, both savory and sweet.

I like the dense, lush texture of Greek-style yogurt, and it is simplicity itself to make at home. Straining it yourself has the added advantage of getting the perfect texture every time.

DIY Greek yogurt
Start with some plain whole milk (full fat) yogurt. Check that it does not contain any cornstarch or other thickening agents as they will hinder the process. Not to be pedantic, but whole milk yogurt should really only contain two ingredients - whole milk and active bacterial cultures.
Line a strainer with a coffee filter (a tea towel or even a robust paper towel would work as well). Pour the yogurt into the filter, cover and refrigerate.

The yogurt will immediately start shedding whey (the greenish liquid in the right photo). The whey can replace buttermilk in pancake and waffle recipes. Russian folk wisdom also claims that the whey acts as a tonic if used as a face wash, rejuvenating and refreshing the skin1.
After 3 hours, the yogurt will reach the consistency of Greek yogurt sold in supermarkets. Left overnight, it will become much denser, losing half its mass. The consistency will be similar to that of mascarpone or a soft cream cheese.
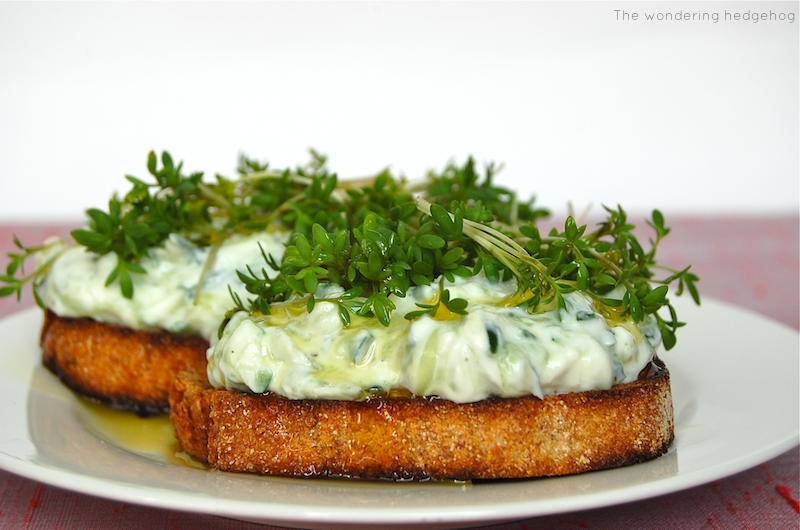
It can be served sweet, topped with honey or fruit, replace cream cheese on a lox bagel or in a cress & cucumber sandwich, and, of course, be used to make tzatziki.

Tzatziki is a versatile dish, and one that's perfect in the summer. The cooling combination of cucumber and yogurt is equally fantastic on raw crudites and fried potatoes, and its garlicky tang makes an excellent complement to grilled meats and fish. The best part? It takes about 5 minutes of work to prepare.

Tzatziki-ish dip
Makes 1 Cup - enough to serve 2 as a starter.
  • ½ English (seedless) cucumber, or 1 regular cucumber
  • ½ Cup strained yogurt
  • 1 clove of garlic
  • a handful of dill (and/or mint and/or parsley)
  • a lemon wedge
  • Salt and freshly ground pepper
  • Olive oil
Wash the cucumber and herbs, peel the garlic clove.

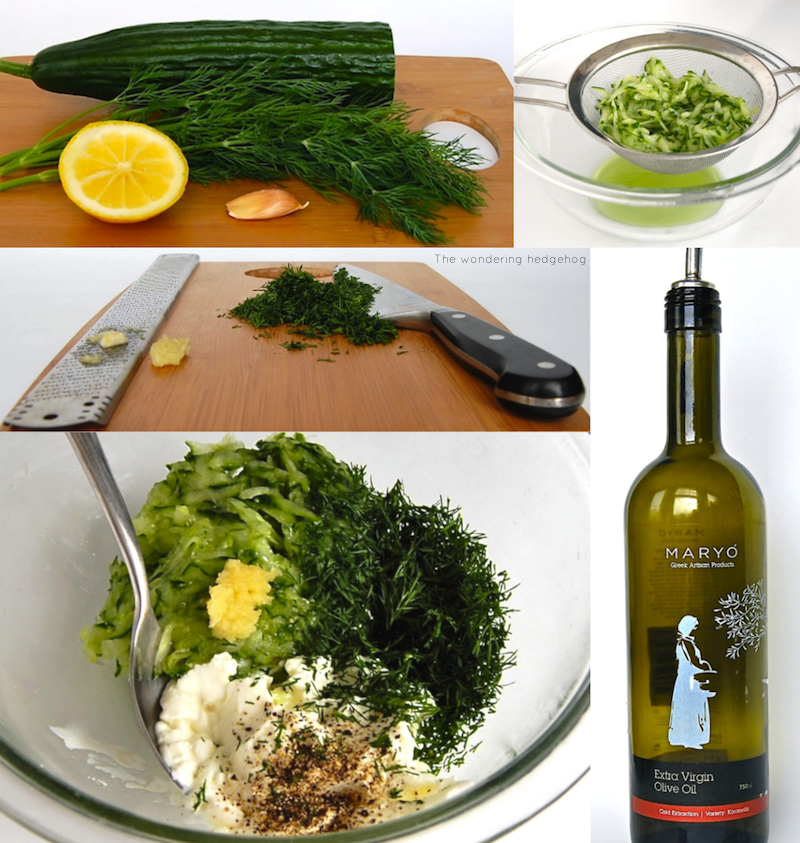
Coarsly grate the cucumber - it should yield around 1 Cup. If using a regular cucumber, cut in half and scrape out the seeds with a spoon before grating.
Place the grated cucumber in a strainer, salt generously and stir a few times. Set aside for 20 minutes to drain. This step firms up the cucumber flesh and prevents the tzatziki from getting watery.

Finely mince the garlic and chop the herbs. In a bowl, combine with the drained cucumber and yogurt; add freshly grated pepper and a generous squeeze of lemon juice. Mix, taste for seasoning and add salt if needed. If not using immediately, cover and refrigerate.
N. B. The garlic flavor will become more pronounced over time - if it is too mild for your taste, either add more garlic and eat immediately, or let it mellow for an hour or two.

Plate, and drizzle generously with a really good olive oil.
Serve with pretty much anything - pita wedges, barbari bread, crudites, potato chips, grilled lamb, smoked fish, or just eat with a spoon.
It also makes for lovely not-quite-right cucumber tea sandwiches.

1 I am not a dermatologist. I have tried using whey as face wash, with no discernible effect either way. Try it at your own risk!

April 13, 2015

Instant ramen hack

     ć„ć‚‰ć—ć‚ƒć„ć¾ć› !!!
                 ~ A common greeting, shouted at customers entering a restaurant in Japan


A bowl of ramen is a strong contender for the title of perfect food. Combining the soothing warmth of soup with the joyous carbohydrate heft of pasta, it packs a wide range of flavors and textures into a single bowl.

My first introduction to the dish was a virtual one, courtesy of a friend who arranged a viewing of Tampopo. The film is director Juzo Itami's love letter to food in general, and ramen in particular. The Japanese take ramen very seriously, as befits a dish of such depth and complexity.

Since watching Tampopo for the first time almost two decades ago, I have been fortunate enough to eat ramen across the Japanese archipelago, including Fukuoka, the birthplace of tonkotsu (pork broth) ramen featured in the film. When placing the order at the counter, we were asked how chewy we wanted our noodles - the only restaurant in my experience where this choice was offered. The soup, prepared by a man who has been running the stall for over 50 years, was incredible.

Unfortunately, the nearest ramen restaurant is over an hour's drive. When the desire for a bowl of noodles cannot justify the trip, I start with that college staple - instant ramen - and make it my own.

This recipe maximizes both value and deliciousness of two quick meal staples - instant noodles and a rotisserie chicken (do not judge - sometime you want to roast a chicken, and sometimes you just want to eat one, right now). A store-bought or home-roasted chicken is the ideal starting point, providing the meat for the soup and the bones to make a deeply flavored, complex broth. Be sure to save all the unattractive bits - they hold the flavor!
Roasted chicken broth
The recipe will make enough for two or three bowls of ramen; the broth is robust but neutral, and of course can be used as a base for any dish that calls for chicken stock. For a larger batch, save up chicken carcases in the freezer (increase the amount of vegetables accordingly). The stock can be frozen in two-cup portions (with shredded chicken meat) for ramen at any time.
Mandatory
  • 1 roasted chicken carcass (bones, fat, skin, gristle, juices)
  • 1 onion, peeled
  • 1 carrot, peeled
  • 1 garlic clove, peeled
  • 1 bay leaf
  • 3-5 peppercorns
  • Salt
Optional
  • ½ small parsnip, peeled
  • 3-4 sprigs parsley
  • 3-5 sprigs thyme
  • ¼ celery stalk
  • ½ leek or 1-2 scallions
Smash the garlic clove.

Thinly slice the vegetables. A mandolin makes quick work of the task, producing uniformly thin slices. Mine is from Kyocera, with a ceramic blade and adjustable slice thickness. I bought it more than 10 years ago (in Tokyo) for around 20 dollars, and it was an excellent investment. I use it almost every day and the blade is just starting to dull.

Place all ingredients in a small pot, and add enough cold water to cover by an inch. Bring to a boil over medium heat. Add a generous pinch of salt, skim any foam from the surface, and lower the heat to an aggressive simmer. Continue cooking (adding boiling water if the bones are exposed) until the chicken carcass completely falls apart and the broth is a rich golden color, between two and three hours.
N. B. It is possible to cook the stock in as little as 45 minutes, but the flavor will not be as rich and require a longer reduction time during the ramen preparation.

Instant ramen noodles, hacked
The combination of flavors, while not strictly Japanese, is a personal favorite. The broth flavorings and ramen toppings are limited only by your preference and their presence in your refrigerator. Tweak and adjust until you get your perfect bowl.

Ramen broth
This method works equally well with any home-made stock (non-roasted chicken, veal, beef, turkey and even vegetable). Avoid the store-bought stocks - the point here is to make something more delicious and less sodium-heavy than the instant soup packet included with the noodles.
Adjust the amount of hot pepper to your preference, or leave it out entirely.
  • 2 ¼ Cups roasted chicken broth
  • 1-2 garlic cloves, thinly sliced
  • ½ inch piece of ginger root, peeled and cut into matchsticks
  • 1 cayenne (or other hot) pepper, cut in half, seeds and veins removed (these have the highest concentration of capsaicin)
  • Splash of soy sauce
Place all ingredients in a small saucepan and bring to a boil over medium heat. Lower heat to an aggressive simmer and leave to reduce for around 5 minutes. Reducing the stock by ¼ cup will intensify the chicken flavor and allow the aromatics to infuse. N.B. If using the 45-minute version of the stock, start with 4 cups and reduce to half of the original volume; add the aromatics after the reduction is almost complete.

While the broth is reducing, prepare the toppings.
Ramen & toppings
  • 1 pack instant ramen, noodles only
  • 1 scallion
  • ½ small carrot, peeled
  • handlful lettuce leaves (spinach, arugula or other tender greens)
  • 1-2 sheets seasoned, toasted nori (seaweed)
  • shredded chicken meat
  • sesame oil
Slice scallions into thin rounds. Cut the carrot into matchsticks. Shred the lettuce. Cut nori into small rectangles.
Once the broth is reduced, add the ramen noodles and cook according to package directions or to the desired consistency (5 minutes in my case instead of the recommended 4). 2 minutes before the end of cooking time, add chicken meat to the pot to heat it.

Place shredded lettuce or other greens in the bottom of the bowl - the heat from the broth will wilt the greens. Once ramen are cooked, add the noodles, chicken meat and broth to the bowl. Top with scallions, carrots and seaweed; add a splash of sesame oil and a sprinkling of sesame. For an authentic experience, feel free to slurp the noodles.

April 3, 2015

Beautiful books & buttered eggs

     "You look a little worried, Bunter," said his lordship kindly to his manservant. "Is there anything I can do?"
     The valet’s face brightened as he released his employer’s grey trousers from the press.
     "Perhaps your lordship could be so good as to think," he said hopefully, "of a word in seven letters with S in the middle, meaning two."
     "Also," suggested Lord Peter thoughtlessly.
     "I beg your lordship’s pardon. T-w-o. And seven letters."
     "Nonsense!" said Lord Peter. "How about that bath?"
     "It should be just about ready, my lord."
     Lord Peter Wimsey swung his mauve silk legs lightly over the edge of the bed and stretched appreciatively. It was a beautiful June that year. Through the open door he saw the delicate coils of steam wreathing across a shaft of yellow sunlight. Every step he took into the bathroom was a conscious act of enjoyment. In the husky light tenor he carolled a few bars of ‘Maman, dites-moi.’ Then a thought struck him, and he turned back.
     "Bunter!"
     "My lord?"
     "No bacon this morning. Quite the wrong smell."
     "I was thinking of buttered eggs, my lord."
     "Excellent. Like primroses. The Beaconsfield touch," said his lordship approvingly.

~ Dorothy L. Sayers, Lord Peter Views the Body

      Upon such occasions poor Mr. Woodhouse's feelings were in sad warfare. He loved to have the cloth laid, because it had been the fashion of his youth, but his conviction of suppers being very unwholesome made him rather sorry to see any thing put on it; and while his hospitality would have welcomed his visitors to every thing, his care for their health made him grieve that they would eat.
      Such another small basin of thin gruel as his own was all that he could, with thorough self-approbation, recommend; though he might constrain himself, while the ladies were comfortably clearing the nicer things, to say:
     "Mrs. Bates, let me propose your venturing on one of these eggs. An egg boiled very soft is not unwholesome. Serle understands boiling an egg better than any body. I would not recommend an egg boiled by any body else; but you need not be afraid, they are very small, you see - one of our small eggs will not hurt you. Miss Bates, let Emma help you to a little bit of tart - a very little bit. Ours are all apple-tarts. You need not be afraid of unwholesome preserves here. I do not advise the custard. Mrs. Goddard, what say you to half a glass of wine? A small half-glass, put into a tumbler of water? I do not think it could disagree with you."
      Emma allowed her father to talk - but supplied her visitors in a much more satisfactory style, and on the present evening had particular pleasure in sending them away happy.

~ Jane Austen, Emma

If cooking is more appealing than reading, click here to go directly to the recipes.
A well-written book and a delicious meal have much in common. The reader and the diner both experience intense pleasure, simultaneously relishing the moment and eagerly awaiting to see what will come next. The joy outlasts the event, continuing in memory, discussion and anticipation of a return, even though it is often impossible to recreate that initial sense of discovery and wonder. I always feel a pang of envy when recommending a great book to a friend - they will have the joy of reading it for the first time! A beautiful book cover, like a carefully plated dish, elevates the experience by engaging our senses.

Several years ago, Coralie Bickford-Smith designed new covers for literary classics from Penguin Books. Bound in broadcloth, the books immediately create a tactile connection. The embossed designs add a second textural layer - running your fingers over the imprinted cloth creates a immediate sense of satisfaction. The substantial tomes harken back to a time when a book was more than a temporary possession; it was something to be kept and cherished for many years.

The bright graphics feel incredibly modern and at the same time offer a perfect compliment to the venerable contents. The cover for Emma features the eponymous Regency chair; the color is evocative of the early 19th century cerulean blue, a greenish-blue tint that was the precursor to the Victorian sky-blue shade of the same name.

© Penguin Books Drawing room chairs. 1826. NYPL Digital Collection

The color was popular in both fashion and home decor. The desired hue was achieved with a copper-cobalt dye pigment; as the copper oxidized, the fabric would take on a greenish tint.
The Repository of Arts, Literature, Commerce, Manufactures, Fashions, and Politics: No. XX. England, London, August 1810. LACMA Collections Online Source unknown
A quick side note: The fabric sample card on the left was included in the August 1810 issue of the Repository of arts, literature, commerce, manufactures, fashions, and politics, colloquially known as Ackermann's Repository, or, simply, Ackerman's. This publication was the Vogue of Jane Austen's time, setting the trends for architecture, fashion and literature. It would be fabulous if modern shelter magazines included fabric samples!

Ms. Bickford-Smith's designs for Austen's other works continue the period color scheme. The graphics feel inspired by fashionable Regency colors such as evening primrose (a deep, rich yellow) and coquelicot (a red so vibrant it was not permissible for well-bred ladies to wear it except in trimmings or accessories).
© Juniper Books LLC

Ms. Bickford-Smith's clever covers are not limited to period romances. The dark and moody design for Bram Stocker's Dracula features garlic scapes and flowers, a sly allusion to the antagonist's well-known allium allergy. The Hound of the Baskervilles cover is a seemingly innocuous collage of moth specimens; hidden in plain sight is a death's-head moth with its sinister skull-like markings - the friendly amateur entomologist who is concealing dark secrets.

© Penguin Books © Juniper Books LLC


In 2012, Open Road Media released new Kindle editions of the complete detective works of Dorothy L. Sayers, proving that an e-book can be just as charming as a leather-bound tome.
Cover art and design by Katrina Damkoehler
Between 1923 and 1937, Dorothy L. Sayers published a series of detective novels and short stories featuring the aristocratic sleuth Lord Peter Death Bredon Wimsey. Sayers herself led an extraordinary life - one of the first women to matriculate at Oxford University, she was a poet, playwright, translator and dedicated Christian scholar. Her life's work was the translation of Dante's Divine Comedy (unfinished at her death); her fame came from writing detective fiction.

Sayers' personal life reads like a great story - tempestuous affairs with writers and artists; an unexpected pregnancy, the illegitimate child left with relatives to be raised under an assumed parentage; an eventual happy marriage and, at the reading of her will, a posthumous revelation that her nephew was really her son (and sole heir). Sayers incorporated some details of her personal life into the Wimsey stories - a woman's unhappy affair becomes a plot thread that weaves through seven novels. This co-mingling of life and art flowed in both directions - although Sayers abandoned her last Lord Peter novel unfinished on the eve of World War II, she referred to him as a "permanent resident in the house of her mind" and said she found herself "bringing all her actions and opinions to the bar of his silent criticism"1.

Ms. Damkoehler's covers for the Lord Peter books perfectly capture the many aspects of the man himself in illuminating, exquisite detail. Lord Peter is a scholar, a dandy, a collector of fine wines and rare editions, a brilliant detective and a cosmopolitan man about town. His monocle is more than an distinguishing affectation - it is both a tool of the detective trade and a disguise which his lordship uses to hide his emotions. The witty use of garments gives clues as to the novel's when and where - linen suit for a summer at a seaside bathing resort; red tartan jacket and an argyle sweater for Scotland; a fur-trimmed coat for a winter drive through the Fenlands; hunting tweeds for a shooting party in Yorkshire in October. The designs make it clear that our hero is, along with other quests crucial to the plot, attempting to achieve sartorial splendor.

                                                                                                                                                                                         Click here to see larger images

Lord Peter is a gourmet with an unrivaled palate, but not a snob. He demands the best on his plate, be it perdrix aux choux or boiled peas - it does not have to be complicated, although it does have to be of the best quality and delicious. As his lordship himself put it: "I have never regretted Paradise Lost since I discovered that it contained no eggs-and-bacon.”2 His interest in food is so profound and self-evident in the novels that an entire book has been published on the subject. Sadly, it was missing the delicious-sounding buttered eggs. I have attempted to rectify this omission; you can judge the results for yourself.

Bunter's buttered eggs
This makes the most tender, creamiest scrambled eggs I have ever eaten, without any milk or cream.
It is important to use a non-stick pan, preferably one with a heavy bottom.

Per person:
  • 2 eggs
  • 2-3 teaspoons butter
  • Salt and pepper to taste
Put the butter and eggs into a cold pan. Place the pan on the lowest heat possible and start stirring. The eggs and the butter will first be broken, then form a homogenous mass.

As the eggs heat, they will start forming soft curds on the bottom of the pan. Stir the cooked egg up to the surface to ensure gentle, even cooking. Once the spatula leaves a clean mark on the bottom of the pan, sprinkle the eggs with a pinch of salt. For the first few minutes it will seem as if nothing is happening - keep stirring and resist the temptation to increase the heat!

If the egg curds are setting too quickly, remove the pan from heat for about 30 seconds and stir well before returning to the stove.
Cook, stirring continuously, until the eggs reach desired consistency, around 3 minutes. Season to taste with freshly ground pepper and serve.

Serle's boiled eggs
Adapted from The Breakfast Book, an excellent addition to any cookbook shelf. The plate tip is from the chef extraordinaire Heston Blumenthal.

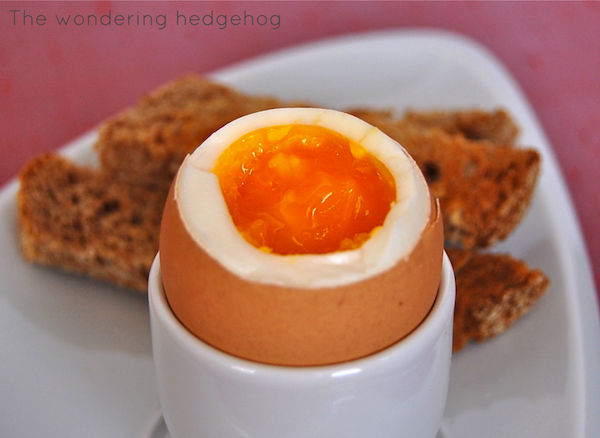
My perfect boiled egg has a well-set white and a warm, creamy yolk. The simple task of cooking a soft-boiled egg is complicated by fact that the albumen (white) has a higher setting temperature than the yolk. To solve this challenge what follows is not so much a recipe as a process description.
Bring a pot of water to a boil3. Exact amount of water will depend on the dimensions of the pot - the egg should be covered by at least an inch of water; it is better to use a larger pot if making more than one egg - the larger the water volume, the smaller the drop in water temperature when the eggs are added.

When the water comes to a boil,lower the heat to a simmer and place a small plate in the bottom of the pot - this will insulate the egg from direct heat. Using a spoon, gently lower the desired number of eggs into the pot. After 7 minutes (exact time depends on egg size and your personal preference), the white should be set and the yolk silky. If the egg is over or under for your taste, adjust the cooking time accordingly. Rinse under cold water to stop the cooking and serve, preferably with some buttered toast soldiers.


If you are interested in learning more about the process of designing a book jacket, Wired magazine published an interview with Peter Mendelsund, the artist behind the cheery yellow cover for The Girl With the Dragon Tattoo.


1 Dorothy L. Sayers & Jill Patton Walsh, Thrones, Dominations, Author's Note.
2 Dorothy L. Sayers, Busman's Honeymoon, Chapter IV: Household Gods.
3 This is a perfect time to use an electric kettle, if you have one. It will be both much faster and more energy efficient than boiling the water on the stove.

March 26, 2015

Carrot-feta salad with tahini dressing

I'm trying to impress people here, Lisa. You don't win friends with salad.
~ Homer J. Simpson, The Simpsons: Lisa the Vegetarian

As an opportunistic omnivore, I eat almost everything. Joyfully, most foods turn out to be tasty, if not downright delicious. The list of foods I have disliked and would prefer to avoid in the future is mercifully short - sea cucumbers (childhood phobia plus a texture bias), boiled onions and boiled carrots. That last one seems particularly sad - the soggy texture, the washed-out color, the watered-down flavor. Bright orange, sweet and crunchy are the defining characteristics of carrots; it seems unjust to deprive them of their identity.

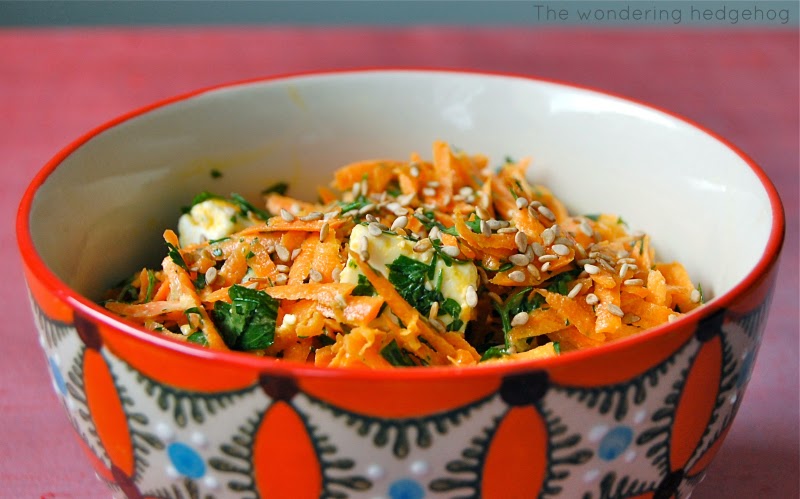
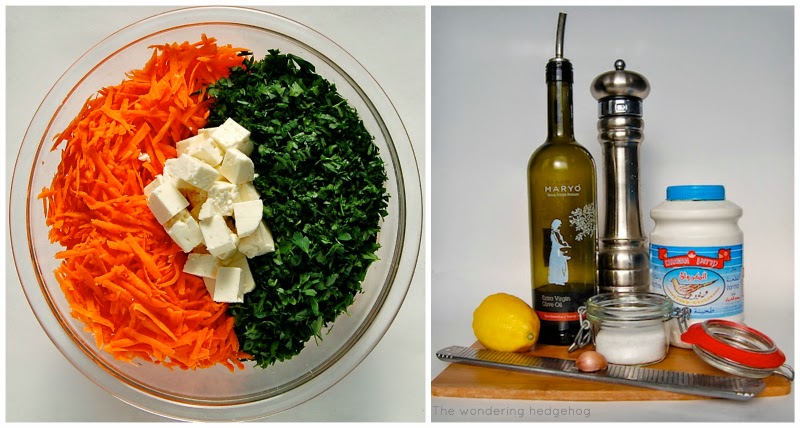
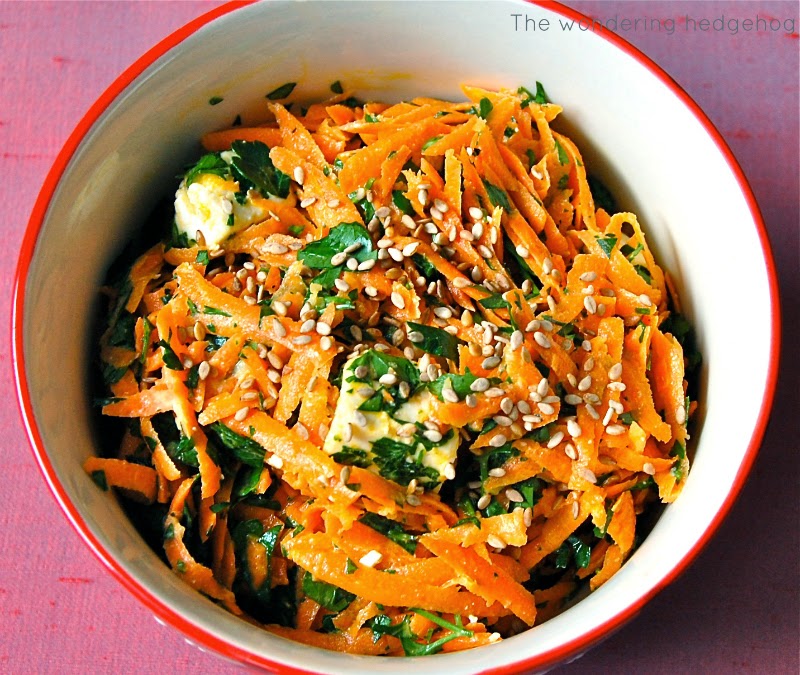
Thankfully, this salad both highlights and takes advantage of the carrot's natural talents. Bright in both color and flavor, it brings together the sweetness of carrots, the grassy sharpness of parsley and the briny tang of feta. The result is both good and good for you, full of vitamins and antioxidants, and studded with luscious cheese.

Serve with olives and some charcuterie as an appetizer, as a light side with meat or fish (perhaps omitting the feta), or by itself as a refreshing lunch. However it is presented, everybody goes for second helpings.

This salad is indebted1 to Deb Perelman's carrot salad with tahini and crisped chickpeas. After trying Deb's recipe, I found that I absolutely loved the zesty tahini dressing and the way it contrasted with the carrots. The roasted chickpeas and pistachios were not not my favorite elements - the carrots had enough texture on their own, and I found myself wandering in a different direction, a salty softness in place of spicy crunch.

Carrot-feta salad with tahini dressing
Serves 4-6
Do make more than you need. This dish is seriously addictive, and keeps very well in the refrigerator for several days.
Salad
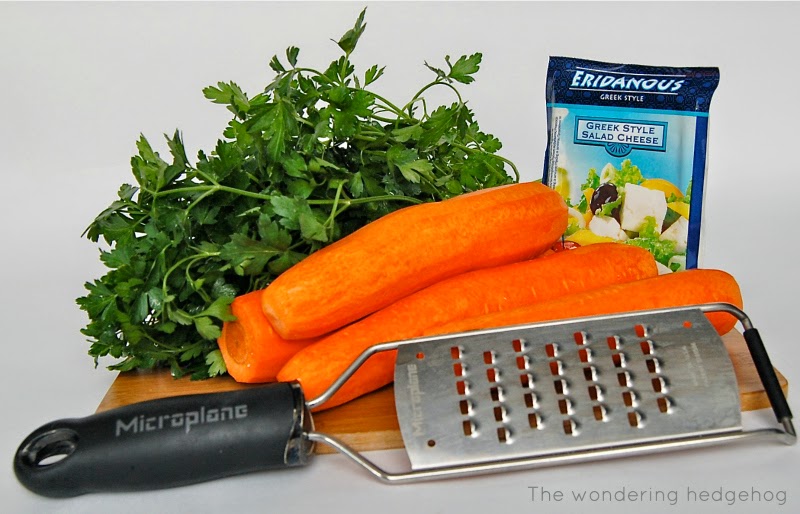
  • 1.5 pounds carrots (4-7, depending on size)
  • 1 large bunch of parsley (2-3 cups loosely packed leaves)
  • ½ pound feta cheese
Dressing
  • 2-3 Tablespoons fresh lemon juice (1 medium lemon)
  • 2 Tablespoons tahini
  • 2 Tablespoons olive oil
  • 1-2 Tablespoons water (bottled or boiled)
  • 1 clove garlic
  • 1 teaspoon kosher salt
  • freshly ground black pepper

Peel and grate the carrots on the the large holes of the grater. A food processor shreds the carrots too finely to maintain the crunch; a little additional effort here makes a big difference.

Wash the parsley, shake off as much water as possible (or use a salad spinner) and remove the leaves from the stems. Roughly chop the leaves - they should be small enough to blend easily with the carrots but large enough to still have some texture.

Cube the feta cheese. If you are feeling particular, 1cm (¼ inch) cubes.

Prepare the dressing directly in a large bowl. Peel and finely mince the garlic. Add olive oil, salt and pepper.

Stir the tahini well before using. Tahini will separate over time, with solids sinking to the bottom and a layer of sesame oil forming on the top. Use a clean, dry utensil - tahini keeps practically forever, as long as it is not contaminated.

Roll the lemon on the counter before cutting and juicing to break the membranes and release more juice. If using a lemon directly from the refrigerator, microwave for 30 seconds before cutting. Juice the lemon into the the bowl (use a strainer or your fingers to catch the pips) and mix the dressing. Tahini will emulsify the dressing; add 1-2 Tablespoons of water to thin it out - it should pour easily.

Add the grated carrots, chopped parsley and cubed feta to the dressing; mix to combine. Taste and adjust the seasonings if necessary.

Serve sprinkled with toasted sesame seeds for an added crunch.

A quick ingredient note - the olive oil used in the dressing was a lovely gift from a thoughtful friend. The oil came from friends of the friend - a Greek couple who recently started a small business exporting artisanal olive oil (from a monastery, no less!). This oil is absolutely wonderful. It has a bright, grassy flavor without being bitter or overpowering. It is robust enough to stand up to sharp flavors like garlic and feta, and mild enough to dress delicate greens. I have been lucky enough to taste olive oils from some amazing producers all over the Mediterranean, and this is easily in my top three. I really recommend visiting Maryó's webstite and purchasing a bottle or two2.
1Ha! A terrible, unintentional pun.
2Sadly, this recommendation is not sponsored with additional bottles.