
| A mountain of sugar is too much for one man. It's clear now why God portions it out in those tiny packets, and why he lives on a plantation in Hawaii. |
| ~ Homer J. Simpson, The Simpsons: Lisa's Rival |

Sugar, on the other had, undergoes a true metamorphosis - there is nothing in caramel's appearance, texture or flavor that allows us to immediately pinpoint its origins. Like its progenitor, caramel is sweet, but it is a wild, almost feral sweetness - dark and layered, with hints of vanilla and almonds, edging slowly into bitterness with an almost imperceptible undercurrent of wood smoke. For something with such a complex character, caramel is surprisingly easy to make, requiring only sugar, a pan and some patience.
Caramel recipes are often intimidating, enumerating the various stages of sugar syrup and proclaiming a candy thermometer an indispensable tool. A variety of caramel sauces, nut brittle and even pulled sugar can be made based on color alone, keeping in mind that the longer the sugar cooks (and darker it becomes), the more pronounced the bitter notes. A rich amber color is a good starting point for the recipes below; carefully dip a clean spoon into the syrup once it turns a light amber, and repeatedly taste as it gets progressively darker to find your preferred flavor profile.
The type of cooking vessel is less critical than its shape - you can use a small frying pan, a skillet or a small pot. The key characteristic is straight (or expanding) sides, to facilitate evaporation and reduce the chance of sugar crystallizing. To promote even heating, look for a vessel with a heavy bottom.
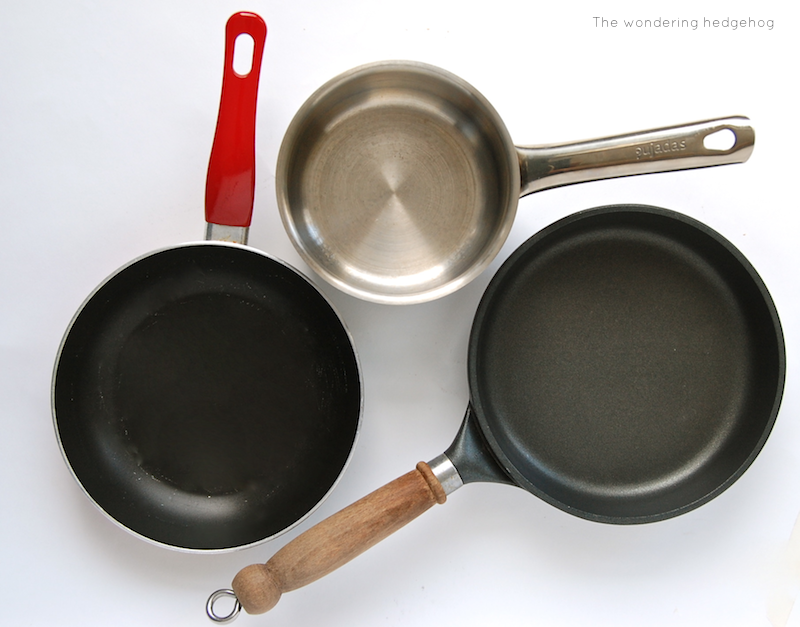
A word of caution: sugar syrup boils at a much higher temperature than water, and can cause severe burns. Do not attempt to taste the caramel by sticking a finger into the bubbling syrup, no matter how enticing the smell. It is advisable to keep a bowl of ice water nearby, just in case.

Caramel can be made either dry or wet. The dry method is simply setting a pan of sugar over medium heat and waiting until the sugar starts to melt. The wet method begins with a combination of sugar and water, and cooks the syrup until all the water has evaporated. The process takes marginally longer, but may be more comfortable for the novice maker; it is my preferred approach in the following recipes.
Substitute almonds or pistachios if you prefer. Roasting raw hazelnuts (or almonds) dramatically improves flavor and aesthetic appeal.
Makes 2 large bars.
- 1 Cup raw hazelnuts (filberts)
- 1 Cup white granulated sugar
- ½ (or less) Cup cold water
- ½ teaspoon fleur de sel, sea salt or kosher salt
Preheat the oven to 375°F/180°C. Place the hazelnuts on a baking sheet and roast for 12-15 minutes, shaking the tray once or twice, until the skins start to peel away and the exposed meat browns. Remove from the oven, wrap the hot hazelnuts in a folded tea towel and rub vigorously to remove as much of the skins as possible (or skip this step if feeling lazy).

Leave whole (more attractive presentation) or place the peeled hazelnuts (preferably while still warm) back on the tray and crush lightly by pressing down with a heavy-bottomed pot (more economical).

Place the prepared tray near the stove, and start the caramel.
Basic caramel
Place the sugar and water into a pan, and bring to a boil over medium-high heat. Lower the heat to medium and evaporate the syrup, gently agitating the pan occasionally, until it begins to color, around 10 minutes. Reduce the heat to low, and continue to cook the syrup until the desired level of caramelization is reached. Darker syrup will offer a more complex flavor; it will also have more bitter notes, which is not to everyone’s taste.
Caramel is fairly forgiving - if instead of a merrily bubbling syrup you find yourself staring at a pan full of sugar clumps, do not despair. Add enough hot water to dissolve all the crystals, lower the heat and start again.
Patience is essential when making caramel. The cooking process follows an exponential curve - nothing happens for the first 3 minutes, followed by 10 minutes of slow evaporation, and another 5 minutes of rapid caramelization.


Wait at least 30 minutes to allow the caramel to set before removing the brittle from the tray. If you can force yourself to share, pack the brittle in cellophane or wrap in wax or parchment paper for a lovely home-made gift.
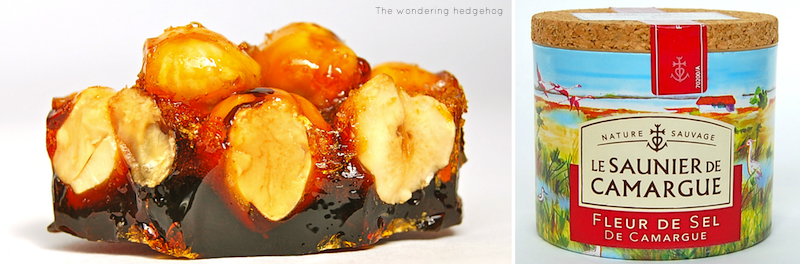
This recipe, with or without alcohol, makes a decadent topping for waffles, pancakes, ice-cream or yogurt.
Serves 2.
- 2 Tablespoons sugar
- 1½ teaspoons unsalted butter
- 1 ripe banana
- pinch of fleur de sel, sea salt or kosher salt
- 1-2 Tablespoons rum or brandy (optional)

Peel the banana and and slice on an angle into ¼ inch (1cm) thick slices.
Combine sugar and just enough water to form a paste (a Tablespoon or two should be enough) in a small frying pan. Bring to a boil, and cook until the caramel reaches a medium amber color.
Take the pan off the heat, and add the butter; be careful, the caramel will bubble and sputter. Return to low heat and swirl to combine. Carefully add the banana slices. Let cook for 30 seconds, and gently flip the bananas over. Optional - add the alcohol, let heat for 5 seconds and ignite (with a match or directly from the gas flame). If the caramel sauce is getting too thick and sticky, thin out with a Tablespoon or two of water.
Spoon over the yogurt (or ice-cream, pancakes, waffles, etc.) and sprinkle with salt.

World’s easiest dulce de leche (caramel sauce)
This makes an incredible sauce for vanilla ice-cream or crepes, and a delicious filling for layered cakes. Stirred into coffee, it transforms a cup of black into café au lait with a caramel shot.
Theoretically, dulce de leche keeps in the refrigerator indefinitely; no empirical verification has been possible so far, as the sauce mysteriously disappears within one week.
Makes 1 can.
- 1 can sweetened condensed (whole) milk

Place the unopened can in a pot. It is advisable to pad the can with a folded towel to prevent irritating drumming once the water comes to a boil.
Fill the pot with enough cold water to cover the can by at least 1 inch (3 cm). Bring to a boil over medium heat; lower the heat to a gentle simmer, and leave on the stove for 3½ to 5 hours, checking the pot every 30-45 minutes and maintaining the water level by adding boiling water as necessary. The longer the cooking time, the denser, darker and richer the sauce.
Let the can cool in the cooking water, or, having reached the end of your patience, open immediately and, spoon at the ready, gaze at the wonder you have made.

To make an easily spreadable or pourable sauce, reheat gently in a water bath - set the open can or a bowl with sauce in a pot with an inch or two of hot water over a low heat. Warm, stirring occasionally, until desired consistency is reached.
Lazy mille-feuille
Cut defrosted puff pastry into 4x1½ inch (10x4 cm) rectangles for individual pastries, or larger squares of any size for a dramatic single torte. At least three layers are advised.
Bake according to package directions. Cool, layer with caramel sauce and top with fresh berries.


