~ Ralph Wiggum, The Simpsons: Das Bus

A cucumber salad might seem like an odd choice for a winter recipe. Defense offers the following arguments: firstly, that the dressing offers enough heat ward off even a severe chill; secondly, as the forecast is oscillating between frostbite inducing -25°C/-13°F and a balmy +12°C/54°F, waiting a few days will likely produce cucumber salad-appropriate temperatures; thirdly, the salad is so delicious it will make you forget all about the weather.
I first encountered this dish at the Han Dynasty restaurant on New York's Upper West Side. Han's specializes in Sichuan dishes, and the salad is traditionally served as a cooling accompaniment to the fiery cuisine of the region. Despite my repeated entreaties, the restaurant declined to share the dressing's secret recipe. After spending some time testing various ingredient options and proportions, I have come up with something that, while not a perfect facsimile, makes a really tasty salad.
The dish offers a really great flavor balance. The cool crunch of the cucumber is offset by the spicy, pungent dressing. The acidity of vinegar is mitigated with a hint of sweetness, and sesame seed oil offers a hit of smokiness and marries the flavors together. The dressing is so good that any remainder is invariably eaten with spoon after all the cucumber slices are gone.
I don't dare call this Sichuan cucumber salad, since it lacks the traditional Sichuan peppercorns and Chinese black vinegar. Instead, the dressing uses ingredients that are likely already in your pantry (and are relatively easy to find), and can be used in a variety of other dishes. If you have Chinese black vinegar in stock, by all means use it instead, and omit the sugar.

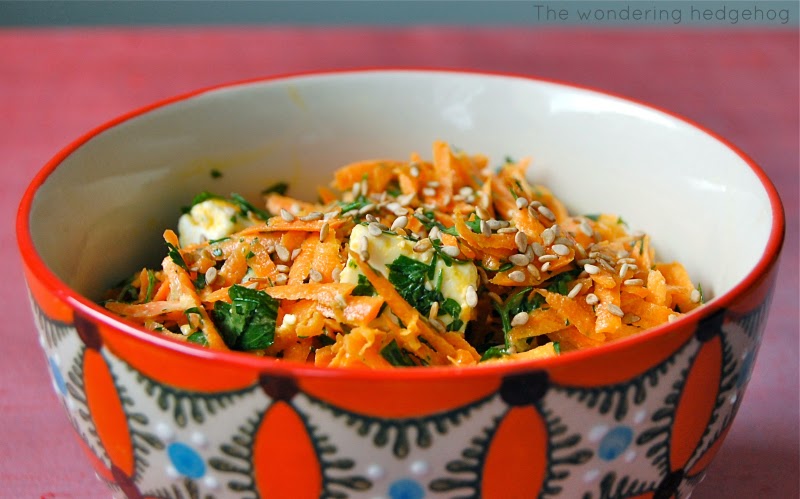
Spicy cucumber salad
2 to 4 servings
- 1 English hothouse or 2 slicing cucumbers (around 1 pound/500 grams)
- 2 teaspoons regular table salt

Place the cucumbers cut side down on the cutting board, and whack with the flat side of the knife (the blade edge facing away, please). Do not hit so hard that the vegetables are pulverized, but use enough force to flatten the cucumber halves into long spears. Smashing increases the surface area, speeding up flavor absorption.
Slice the spears into half-inch (1cm) pieces.

Toss the cucumbers with salt, stir, and place in a colander set over a bowl to drain. Salting and straining firms up and seasons the cucumber flesh. Place in the refrigerator and leave for at least 15 minutes.

While the cucumbers are crisping up, prepare the dressing.
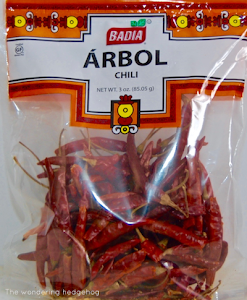
An important note on chili peppers. The dried arbol chilis in the photos have a spice rating of 10-30K Scoville heat units (SHUs), falling on the milder end of the spicy-heat spectrum. Cayenne peppers have a rating of 30-50K SHUs and bird's eye (Thai) chilis pack 100-20K SHUs. Since the Scoville rating is based on identical mass, it is possible to use a spicier pepper in the recipe by using less of it. Removing the ribs and seeds will reduce intensity of the pepper (the seeds are not spicy themselves, but are coated in capsaicinoids, the chemical compounds responsible for sensation of spice). If using a bird's eye chili, I would recommend starting with just one.
Dressing
- 1 large or 2 small cloves garlic, peeled
- 3 dried arbol chilis or 1 fresh cayenne pepper
- 2 Tablespoons sesame oil
- 2 Tablespoons rice vinegar
- 2 teaspoons sugar
- 1 teaspoon soy sauce

Finely mince or grate the garlic cloves.
If using dried chilies, break into large flakes, and discard the seeds. If using fresh pepper, wash and slice into thin rounds.
Place the sesame seed oil and chilis into a small saucepan and set over medium low heat. If the chilis start to brown, reduce the heat to low. Infuse, stirring occasionally, until small bubbles form around the edges of the pan and the chili pieces, 2-3 minutes. Remove from heat and stir in the garlic. After 30 seconds, the garlic should release its aroma but not change color.
Return the saucepan to heat and add the rice vinegar, sugar and soy sauce. Stir until the sugar is completely dissolved, another 30 seconds or so. Remove from heat and set aside to cool. The dressing should be a dark amber color, redolent of chilis and piquant with garlic.

Once the dressing cools to room temperature, assemble the salad. Combine the cucumbers and the dressing in a bowl; mix well, cover and refrigerate for 15 minutes. Stir well before serving.

The salad is an excellent accompaniment to almost any protein, especially heavier cuts such as ribs or pork belly. The spiciness of the dressing cuts through the fattiness of the meat, and the cool, crisp cucumber offers a pleasing palate cleanser. It would also be fantastic with grilled salmon or roast chicken.
The salad does not keep very well, as the cucumbers lose their crisp texture. It is possible to prepare extra dressing in advance and refrigerate it in an airtight glass jar for a few days. Remember, the garlic flavor will gain potency over time. Take the dressing out of the refrigerator to warm up while the cucumbers are straining.
Pantry note: While fresh chilis will look more attractive in the salad, it is expensive to buy 1 pepper at a time, and buying in bulk often produces one or two great dishes plus a bag of moldy chilis. It is more economical to buy a large package of dried chilis and keep it in the refrigerator. Arbol chilis, which offer moderate heat, work well in a variety of cuisines, and it is very easy to turn whole dried peppers into large flakes or chili powder, as needed.